Most people buy a fire pit, set it on the grass, light it the same afternoon, and then spend the next six months wondering why the paint smelled, why there is a dead circle in the lawn, and why the bowl is full of rusty water by the first cold week of November. Fire pit setup and care is not hard, but the order of operations matters more than the name stamped on the box.
I have designed and built fire features for clients for 15 years in western North Carolina, from cheap chimineas that cracked in a single season to steel pits that are still throwing heat after a decade of real use. Fire is simple. Steel and airflow are the two things that are hard, and almost every problem I get called about traces back to one of them.
What follows is the same walkthrough I give a client when a new pit shows up in the driveway: where it goes, how to break it in, how to burn in it, and how to cover it so that it is still a fire pit next spring instead of a planter with a bowl.
Why you should trust me
I have spent 15 years as an outdoor guide and landscape designer, and a large share of that work has been fire features: masonry pits, steel bowls, gas inserts, and more than a few cheap pits that a homeowner bought right before calling me. I keep three pits of my own at the house. A smokeless one for family nights, a classic wood bowl for the nights when I want the real thing, and a gas unit I keep around for client events where nobody wants smoke in their hair.
That means I have watched a lot of steel go through a lot of weather. I know what a thin bowl looks like after two winters, and I know what a properly covered heavy bowl looks like after five. I do not recommend a pit I would not put in my own yard, and I do not call anything smokeless without sitting downwind of it first.
How I picked and how I tested
One honest note up front: I am not going to pretend I burned a full season on every unit that shows up in this article. What I can tell you is the criteria I use and why these two pieces are the pair I point a first-time buyer toward.
The criteria, in order:
- Steel gauge. Thickness is lifespan. A thin bowl is a one-season novelty. If the listing will not tell you the steel thickness, that silence is the answer.
- Smoke behavior. A pit that smokes you out of your own yard is a fireplace with a seating problem. Airflow design decides this, not the size of the fire.
- A real spark screen. Not optional. I have seen what one ember does to a deck, and it is a repair bill, not a campfire story.
- Weather survival. Would it still be standing, and still be usable, after a season of rain and a winter of freeze and thaw?
- Coverage. Every pit I own gets covered once it is cool. Standing water in the bowl is the beginning of the end.
Run any pit through those five questions and you will know more than the marketing copy will tell you.
The two pieces of gear this guide is built around
Setup and care are two different jobs, and they need two different pieces of gear. One is the pit itself. The other is the thing that keeps the pit alive when you are not sitting next to it.
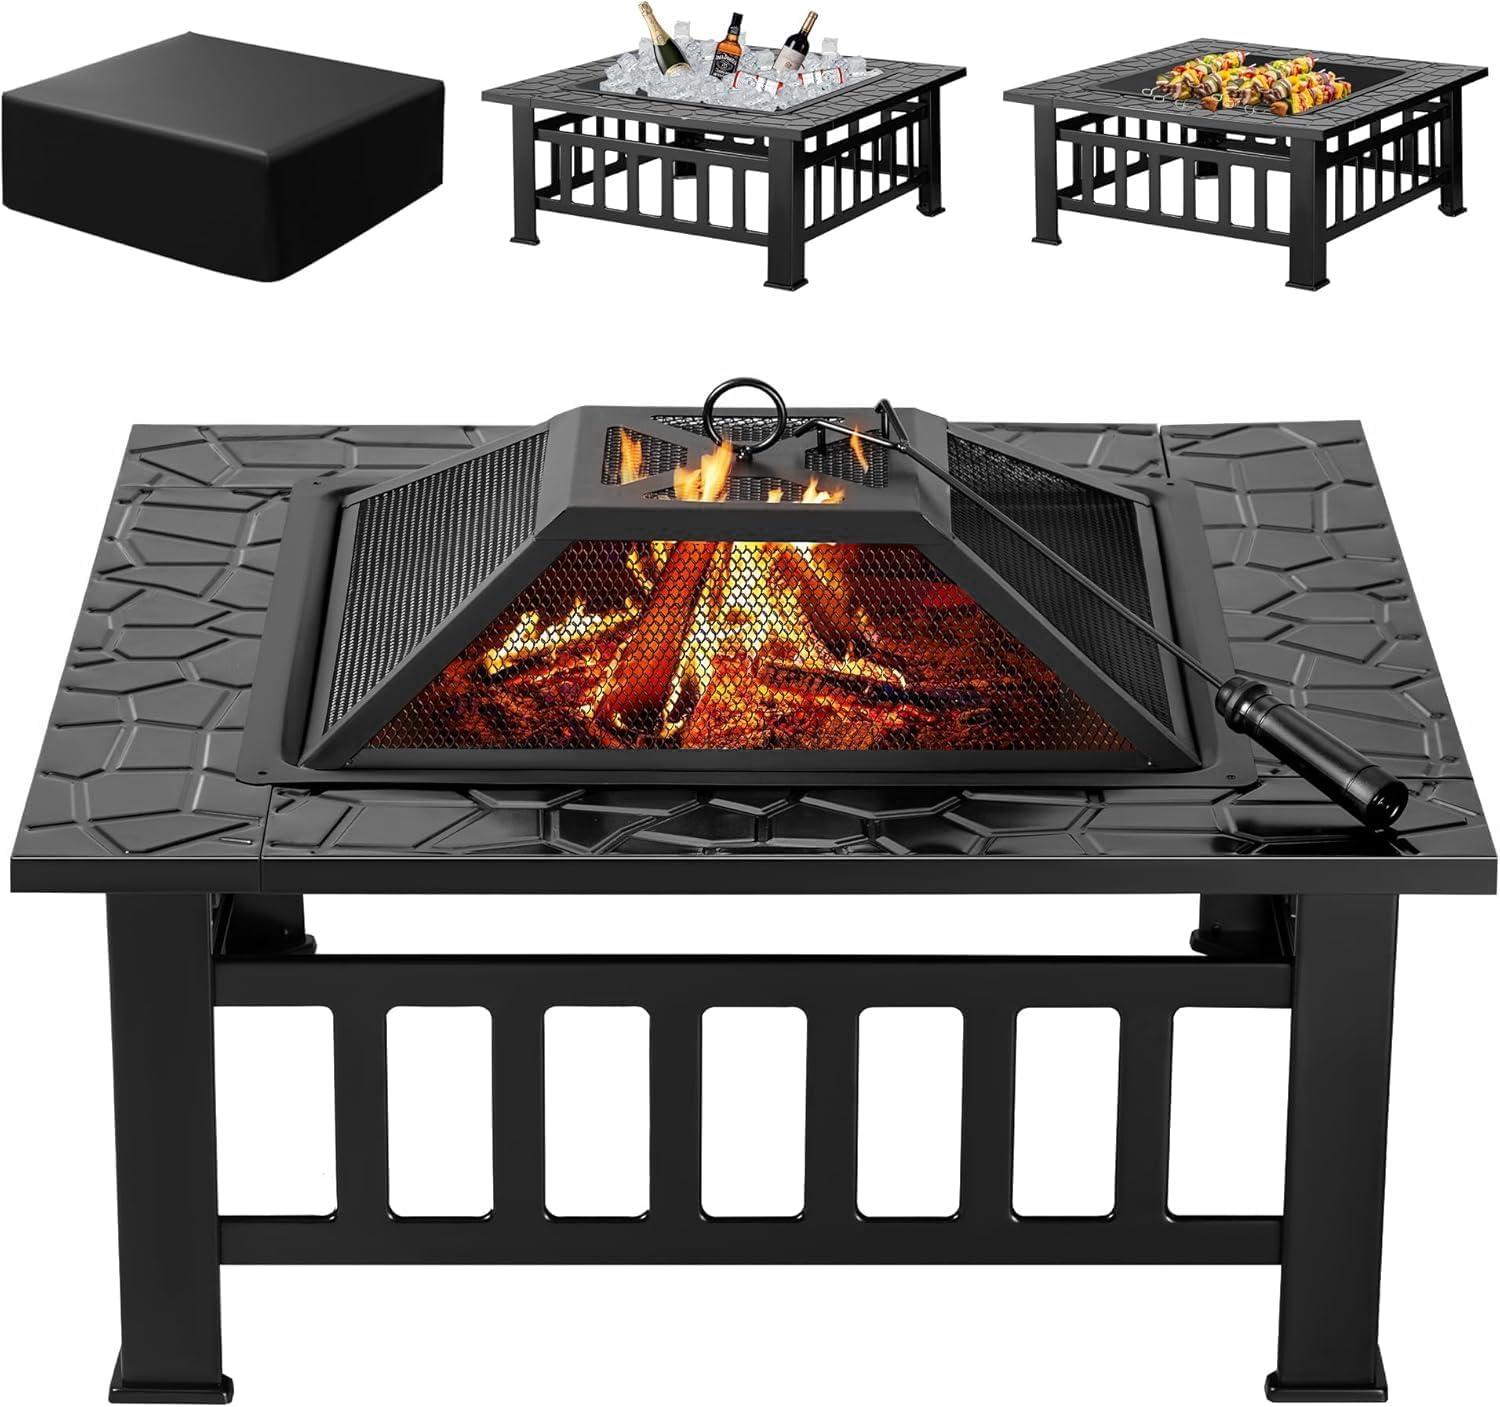
Our pick: Devoko Outdoor Fire Pit, 32 Inch Firepit Table Metal Outdoor Fireplaces
 Visit on Amazon →
Check current Amazon price on the listing, because that number moves and I am not going to quote you a stale one.
32 inches is the size I recommend for a first pit. It is big enough that three or four people sitting around it get real heat, and small enough to fit on a patio without eating the whole space. The fire pit table format also gives you a rim, which sounds like a small thing until you have spent a night holding a drink in your lap.
Before you order, read the listing for two details. Does it ship with a spark screen, and what does the spec sheet say about steel thickness? Those two answers decide whether you are buying a fire pit or renting one from your own driveway for a season. If the listing is vague on both, treat that as a signal.
Caveats worth knowing: A metal bowl on legs gets hot all the way down, so it belongs on stone, gravel, dirt, or a paver pad, not directly on a wood deck. And 32 inches is a permanent fixture, not a camping pit. If you want something you can throw in the truck, this is the wrong shape of product.
This is the pit for someone with a patio and a standing Saturday night.
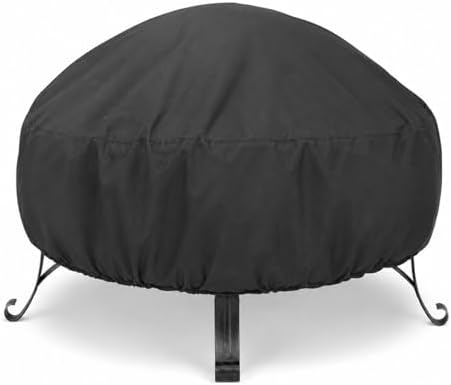
The cover: Round Fire Pit Cover for Yaheetech 23.5 inch Smokeless Fire Pit with Stand 2023 2024 2025 2026+,Waterproof 210D Oxford Fabric with UV-Resistant Lining,Drawstring and Hook & Loop Fasteners
 Visit on Amazon →
Water is what kills fire pits. Not use, not heat, not ash. Rain sitting in the bowl, snow melting into it, and a wet cover trapping moisture against cold steel. A cover is the cheapest insurance you can buy for a pit, and this one is built for the job: waterproof 210D Oxford fabric with a UV-resistant lining, a drawstring to cinch it down, and hook and loop fasteners so a windy night does not turn it into a kite.
One honest caveat, and it matters. This cover is cut for a 23.5 inch smokeless pit with a stand, which means it is sized for that bowl, not for the 32 inch pit above. Measure your own pit across the top before you order anything. A cover that is too small will not go on after the first cold snap, and a cover that is too big will pool water and flap all winter.
Caveats worth knowing: Never put a cover on a warm pit. Let it cool completely, and let the ash can cool too. Trapping heat under fabric is how you ruin a finish. Shake the cover out before you store it for the season, because a cover folded up wet comes back mildewed.
The setup and break-in workflow
Now the part you came for. This is the order I use, and the order matters.
Step one: pick the spot before you pick the pit. Flat ground, at least ten feet from the house, the fence, and anything else that burns. Nothing overhead: no low branches, no roof overhang, no string lights. Check your local burn rules and your HOA rules before you dig anything. If the only open spot is on a wood deck, you need a paver pad or a heat-rated mat underneath, and you need to accept that a deck fire is always a compromise.
Step two: build a base that will not move. Level it. Compacted gravel or sand, or four pavers set flush with the ground. A pit on a slope is a pit that tips when a guest leans on it, and a tipped pit is how you find out what your deductible is.
Step three: unbox and inspect before you assemble. Check the welds, check for dents, check that every leg and every piece of hardware is in the box, and check that the spark screen is there. If the screen is missing, deal with it before the first fire, not after.
Step four: assemble with real tools and a second person. The stamped wrench in the box is a suggestion, not a tool. Use your own sockets, snug the bolts rather than gorilla-tightening them, and get someone to hold the bowl while you attach the legs. Cross-threading a leg bolt on day one is a bad way to start a ten-year relationship with a fire pit.
Step five: the first burn is a cure, not a party. Two or three splits, nothing more. Painted steel off-gasses on that first fire, so do it on a weekday evening before guests arrive rather than at the start of a cookout. Let the fire burn down and let the pit cool on its own. Do not quench it with water. Thermal shock is what warps steel and cracks welds.
Step six: get the fuel right. Seasoned hardwood, split, dry. Moisture is the enemy of a clean burn and a clean burn is the whole point. No trash, no cardboard, no pressure-treated lumber, no plywood. If the wood hisses, it is not ready.
Step seven: respect airflow. Fire needs air more than it needs fuel. Do not fill the bowl to the rim. Keep the fuel load below the rim, leave room for air to move through the pile, and keep the screen on while it burns.
Step eight: run it like an adult. Spark screen on every time. A bucket of water or a pile of sand within arm's reach. No fires on windy days, no fires left unattended, no fires under a covered porch. If you have to kill the fire early, water in a slow stream, then walk away and let it sit.
Step nine: ash the next day, not the same night. Twenty-four to forty-eight hours minimum. Metal bucket with a lid, on a non-combustible surface, well away from the house. Ash holds heat longer than people believe, and this is the step where careless people lose a deck.
The cover routine, in plain steps
This is the part that decides whether you are buying one pit or one pit every other year.
- The morning after a fire, once everything is cold to the touch, empty the ash into your metal can.
- Wipe the bowl dry. Standing water plus steel equals rust, and rust starts at the seams where you cannot see it.
- Look for rust spots or chipped paint. Touch them up with high-heat paint before they spread.
- Put the cover on, cinch the drawstring, and close the hook and loop fasteners.
- Once a month, on a dry day, pull the cover, let the pit breathe, check for moisture, and put it back.
- In spring, uncover it, scrub the bowl, let it dry in the sun, and run one small fire to confirm everything is still sound.
Six steps. Ten minutes a month. That is the entire difference between a pit that looks new in year five and a pit you are hauling to the curb.
What this costs
I am not going to print prices here, because they move and a stale number helps nobody. Check current Amazon price on both listings and do the math yourself.
The math that matters is not the sticker. It is cost per season. A pit that survives five years and a pit that survives one year can look similar on the shelf, and the one that lasts is almost always the one with the heavier steel and the cover on it. Divide what you pay by the number of seasons you get and the cheap pit stops looking cheap. That is the whole argument for spending a little more up front and ten minutes a month after that.
What this guide is not
This is not a gas pit guide. Gas is convenience, wood is the experience, and pretending otherwise does not help anyone. This is not a smokeless pit comparison either, and it is not a camping guide. Those are different tools for different nights, and they deserve their own walkthrough.
This guide is about the boring middle: putting a wood-burning pit in the right place, breaking it in without warping it, burning it clean, and covering it so the weather does not get the last word.
The short version
Pick a level spot away from everything that burns. Build a base that will not shift. Inspect the welds and the spark screen before you assemble. Cure the paint with a small first fire and let it cool on its own. Burn dry hardwood, keep the fuel below the rim, keep the screen on, and empty the ash the next day. Then cover it every time it is cool and dry.
That is the whole job. Do it in that order and the pit will outlast the patio furniture, the grill, and probably the dog.