Most people buy the fire pit first and figure out the rest later. That is backwards. A backyard fire pit setup is three decisions stacked on top of each other: what burns, where the pit sits, and where the smoke goes. Get those right and assembly is a Saturday afternoon. Get them wrong and you own a bowl of rust behind the shed by the second spring.
I have been building and planting backyards in western North Carolina for fifteen years. I have set fire pits on flagstone patios, cut them into gravel beds, and talked more than one client out of putting one under a covered porch. I keep three pits myself: a smokeless one for family nights, a classic wood pit for the nights that deserve real logs, and a propane one for client events where nobody wants smoke in their hair.
What follows is the order I walk clients through. Decide the fuel, pick the pit, prep the ground, then run the first fire without burning anything down. Both fuel paths get covered, with the pit I would hand a client for each.
Why you should trust me
Fifteen years of landscape design, most of it in the mountains around Asheville, means I have watched a lot of fire pits live and a lot of them die. I have seen a cheap steel bowl outlast an expensive "designer" unit because the cheap one had thicker metal and a lid. I have seen thin pans rust through in one wet season. I have rebuilt seating areas around pits that smoked so badly the clients stopped using them.
I do not care what the box says. I care about steel gauge, airflow, and whether there is a real spark screen. Those three things decide whether you get a decade or a single summer.
How I judge a fire pit before I recommend one
Four questions, in this order.
- What is the steel gauge? Thickness is lifespan. A pan with real metal in it survives heat cycling, rain, and being dragged across a patio. Thin stamped steel warps the first time you build a real fire and rusts from the inside out.
- Does the smoke follow you around the fire? A well-designed pit, whether it uses secondary burn or simply good airflow, lets you sit anywhere. A bad one pushes smoke at whoever is closest, all night long.
- Is there a real spark screen? Embers on a deck are how decks burn. A screen is not a nicety, it is the difference between a fire night and a repair bill.
- Would it still be standing after a season of weather? Rain, freeze, thaw, repeat. If the answer is no, it was a decoration, not a purchase.
Notice that flame size is not on the list. Flame size is fuel and air, not the pit. The pit is the container and the airflow, and that is the entire engineering problem.
Wood or propane: decide this before you shop
Wood is the experience. You get the crackle, the smell, the radiant heat that actually reaches your knees, and the slow ritual of tending it. You also get ash, smoke, sparks, a need for dry storage, and a fire you have to babysit.
Propane is the convenience. You get a flame in ten seconds, a knob that turns it off, no ash, no smoke in your hair, and a unit you can load in a truck. You also get a tank to haul, a flame that looks like a fire rather than behaving like one, and no cooking over the burner.
Here is the honest fork in the road. If you want the real thing and you are willing to manage smoke and ash, go wood. If your priority is sitting outside after work with a glass of something and zero cleanup, go propane. If your patio is a rental, a condo, or under a strict HOA, propane is often the only version you are allowed to run at all. And check your burn bans before anything else, because a dry October will shut a wood pit down regardless of what you bought.
The two pits that cover both paths
These are the two I would start a client on. One is a wood and charcoal pit that doubles as a grill. The other is a portable propane unit for people who want ambiance without the smoke.
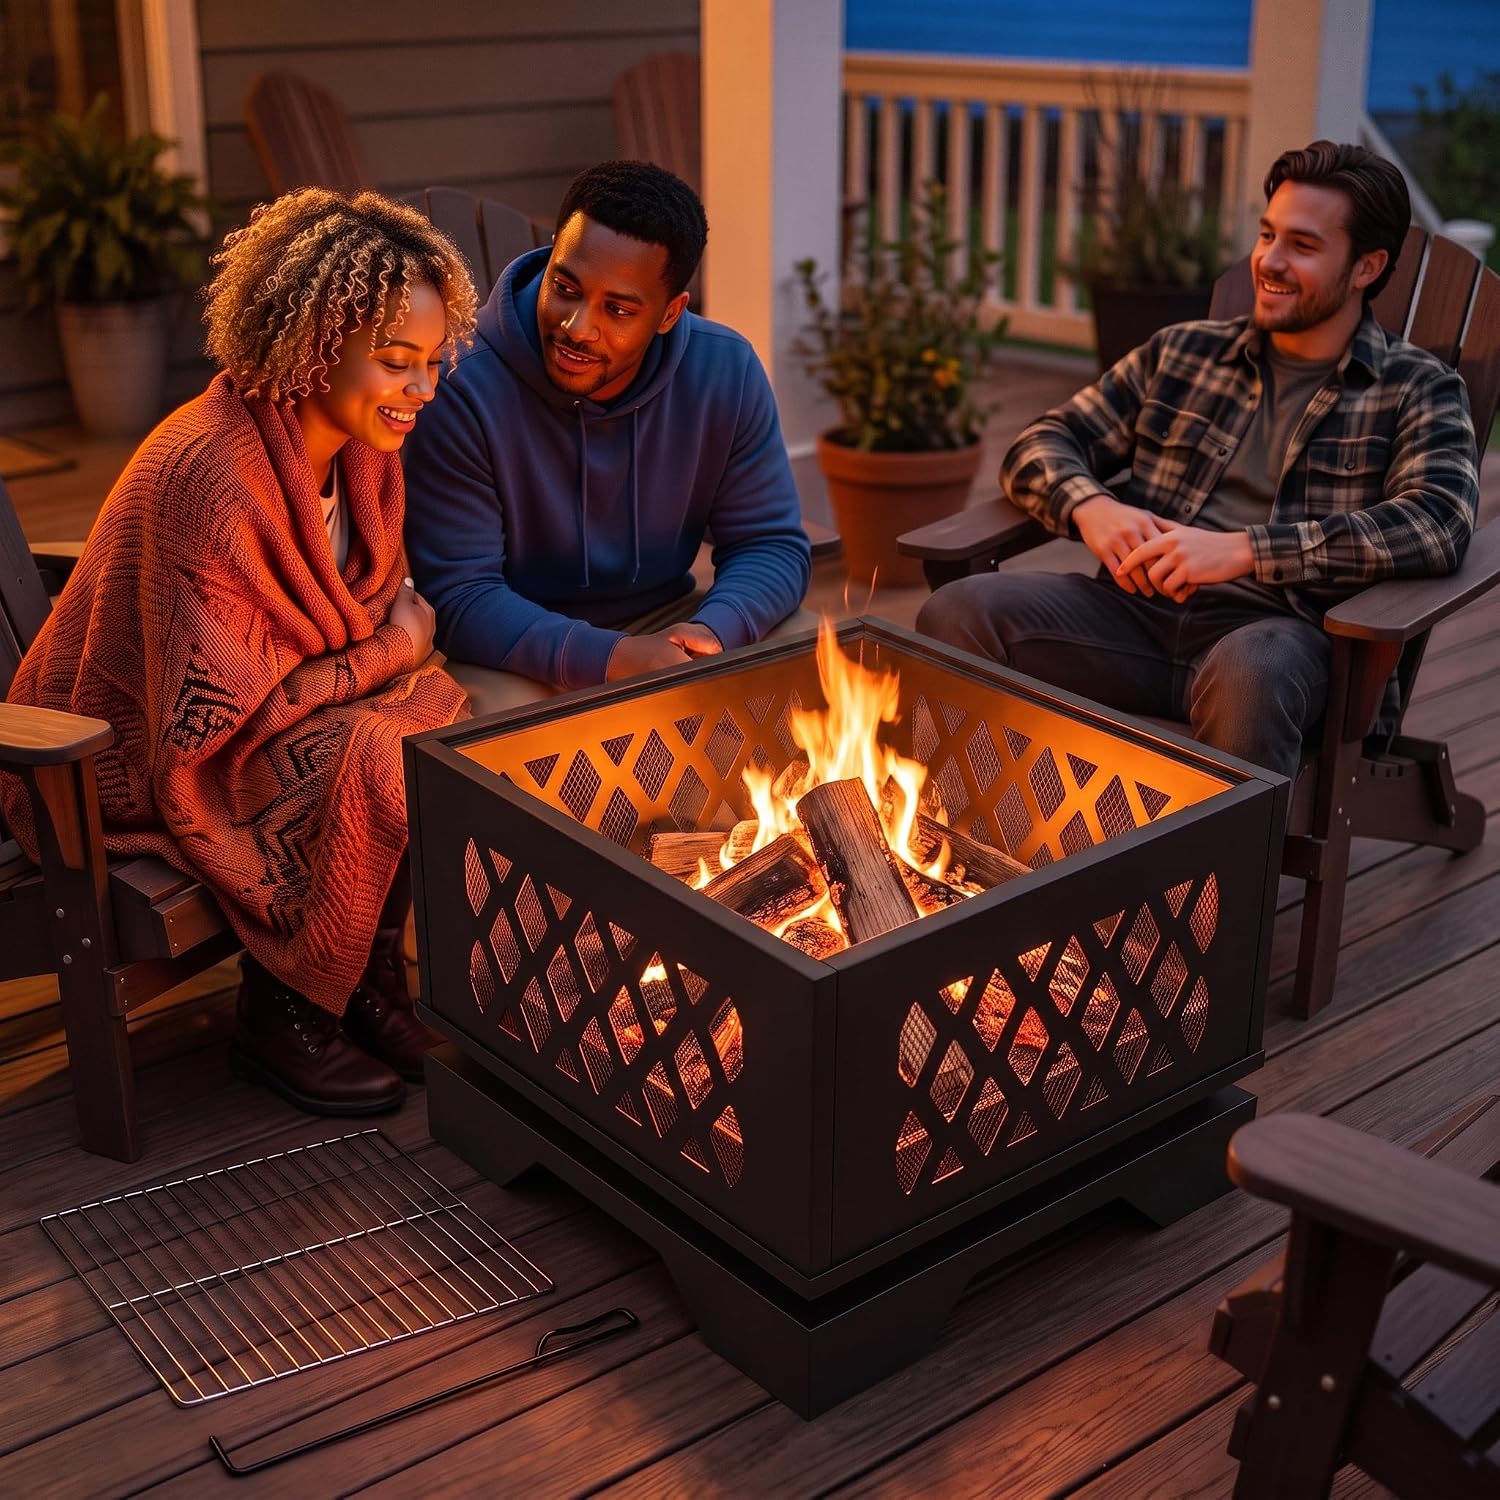
Best for wood-fired heat and cooking: Kingson 20" Square Outdoor Fire Pit, 2-in-1 BBQ Grill, Heavy-Duty Steel
 Visit on Amazon →
The 2-in-1 design is what earns this one a spot. You get a square fire box with a grill grate that drops over the coals, which means the same unit that warms your hands in October can cook burgers in July. Square footprints are also easier to place than round ones, because they sit flush against a patio edge or a retaining wall instead of leaving a crescent of wasted space.
The heavy-duty steel construction is the part that matters most to me. Square, boxy pits generally hold their shape better than thin round bowls, and a box shape gives you flat walls to bank coals against for grilling. At 20 inches across, this is a patio pit, not a bonfire ring. Plan on two to four people around it, not a crowd of ten.
Two things to check on the listing before you order: whether a spark screen and a cover are included. If they are not, buy both. A screen keeps embers where they belong, and a cover is the single cheapest way to add years to any steel pit. If you are burning wood or charcoal, keep your fuel below the rim, because a pit loaded to the top throws sparks and smokes badly.
Flaws but not dealbreakers: A 20 inch box is small for a group, and square pits do not throw heat in a perfect circle the way round ones do. If your idea of a fire night involves six people and a stack of oak, size up.
Anyone who wants one unit for both cooking and sitting by the fire, on a patio rather than a big lawn, will get the most out of this one.
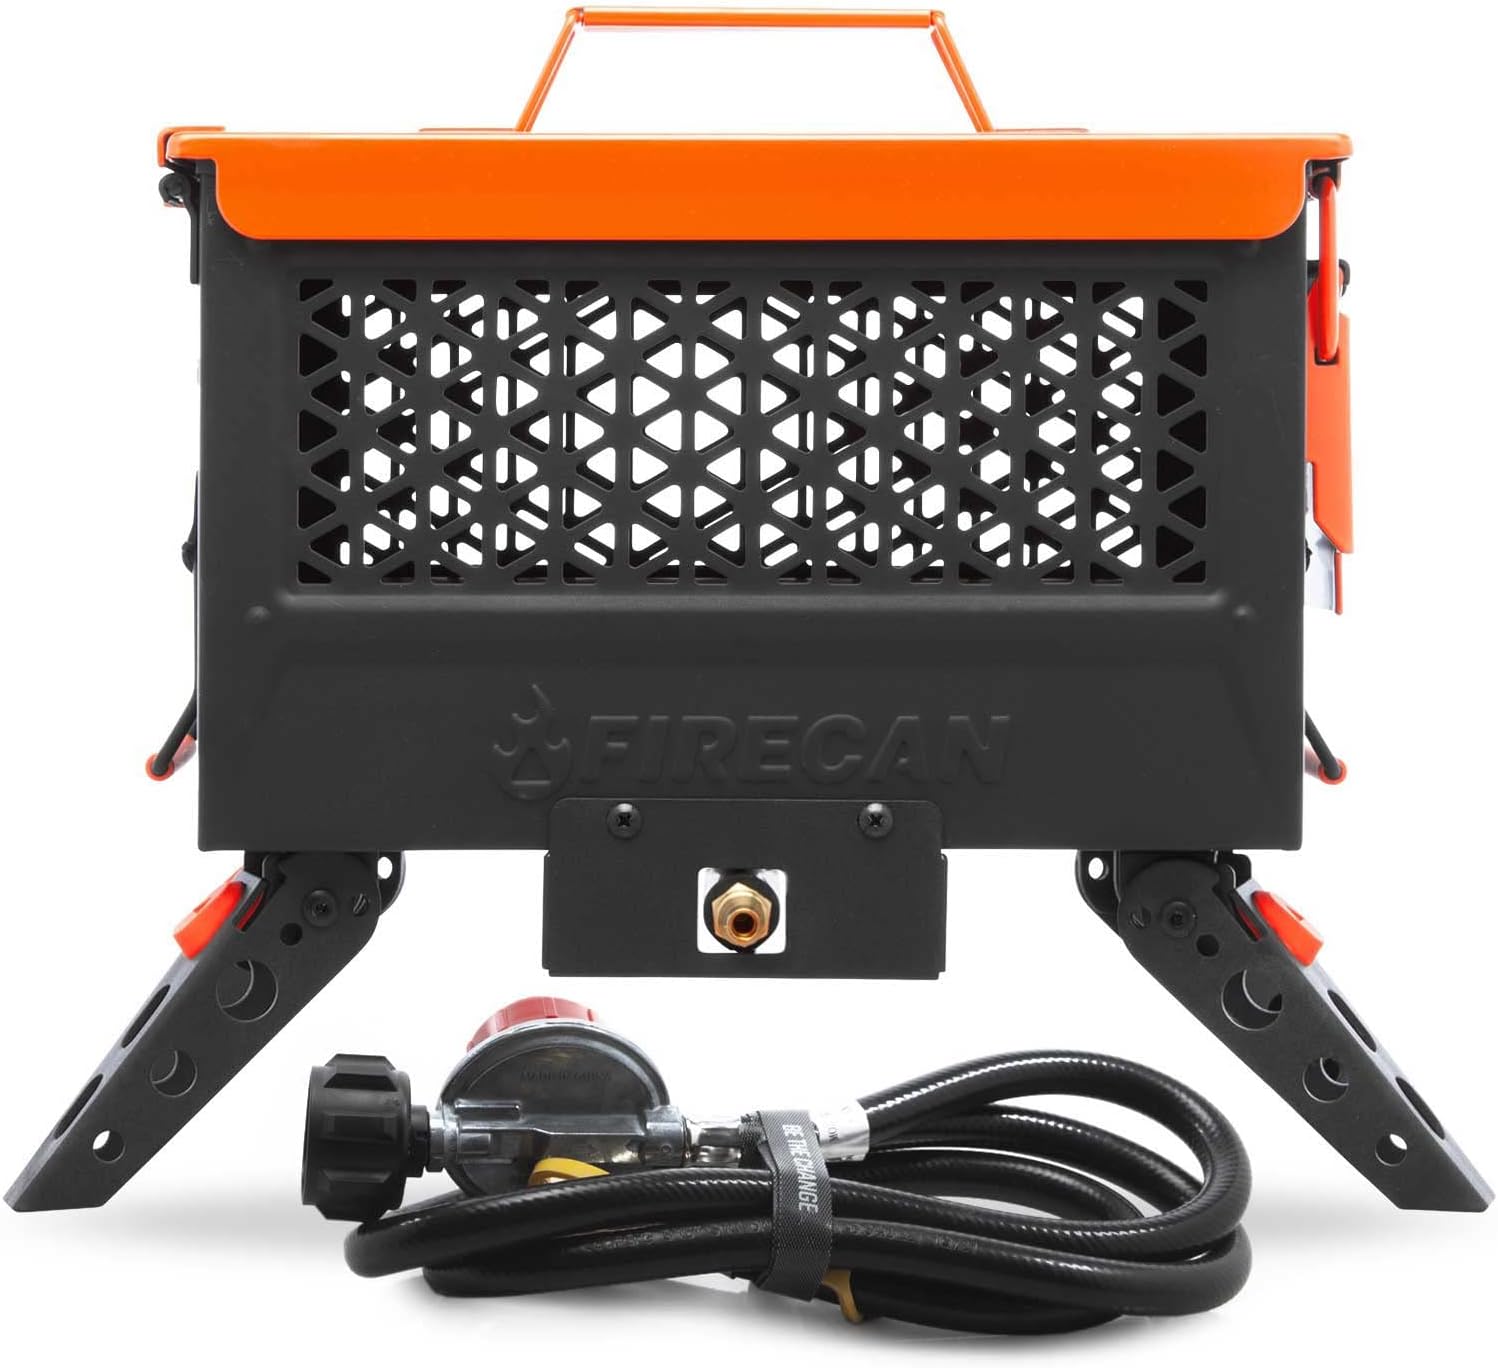
Best for portable propane convenience: Ignik FireCan Portable Propane Fire Pit with Hose and Regulator
 Visit on Amazon →
The hose and regulator are the selling point here, and people miss why. A unit that ships with a hose and regulator runs off a standard refillable propane tank instead of a proprietary disposable canister. That means cheaper fuel over time, no hunting for the right canister at 9 p.m., and the ability to run the same tank you already use for a grill. The portable form factor means it packs into a truck bed or an RV bay, which is why this is the one I point traveling clients toward.
For a deck, a small patio, or a tailgate where wood smoke is unwelcome or outright banned, this is the clean answer. Open the tank valve, ignite per the manual, and you have a flame with no ash to haul and no embers to chase.
Three rules, and they are not negotiable. Never run it indoors, in a garage, in a tent, or under a roof or awning, because propane combustion produces carbon monoxide and a covered space will collect it. Never add wood or charcoal to the burner, because that damages the burner and gives you a fire the knob cannot control. And always leak test the connection with soapy water before the first light of the season, watching for bubbles at the regulator and the tank fitting.
Flaws but not dealbreakers: It is a propane flame, so it looks like a fire more than it behaves like one, and it will not give you the radiant heat of a real wood bed. It is also not a cooking surface.
Anyone in a rental, a townhome, or a travel setup who wants a fire in ten seconds and a clean shutdown will be happiest here.
Site prep: the part everyone skips
Placement is where a setup succeeds or fails, and it is free to get right.
- Choose a surface that cannot burn. Gravel, stone, concrete, brick, or bare mineral dirt. Not grass, not mulch, not dry leaves, and not a wood deck unless local rules and the manual explicitly allow it with a stand-off.
- Respect clearance. Most manufacturers and codes land around 10 feet from a structure and a few feet from anything combustible. Watch for low tree limbs, roof overhangs, and vinyl siding, which can deform from heat long before it ignites.
- Read the wind. Find the prevailing direction on your property and put the seating upwind of the pit. This one move eliminates most of the "smoke follows me" complaint.
- Level and clear the ground. No roots, no buried irrigation lines, no dry debris underneath.
- For propane, plan the tank. Store it upright, outside, never in a closed garage or shed, and never beside the fire.
Setting up a wood pit, step by step
Step one: Assemble per the manual. Every bolt snug, nothing cross threaded. A wobbly pit tips, and a tipped pit puts embers on the ground.
Step two: Set it on a non-combustible base. Even on a stone patio, a thin sand or ash layer under the pan protects the surface from heat staining.
Step three: Cure the finish with a small first fire. A short, modest burn lets the paint or coating set. A roaring first fire can blister a finish that would have been fine.
Step four: Build an ash bed. An inch of ash insulates the bottom of the pan and helps the next fire catch faster. Leave it, do not scrub it out.
Step five: Start small and hot. Tinder, then kindling, then split logs. A small hot fire burns clean. A big smoldering pile makes smoke, and smoke is the enemy.
Step six: Keep the fuel below the rim. Logs stacked above the rim throw sparks and drop burning debris outside the pit.
Step seven: Screen it. Spark screen on from the first flame to the last ember. This is the step people skip and regret.
Step eight: Kill it properly. Let the fire burn down to ash. Spread the coals, let them gray out, then douse with water and stir. Never dump hot ash into a paper bag, a plastic bin, or a trash can.
Setting up a propane pit, step by step
Step one: Connect the regulator. Hand tighten the fitting to the tank. No tools, no tape, no forcing.
Step two: Leak test. Brush soapy water on the tank connection and the regulator. Bubbles mean a leak, and a leak means stop and fix it before you light anything.
Step three: Position it. Level, non-combustible surface, out from under any roof, awning, or overhanging branch, and clear of the seating on all sides.
Step four: Light it low. Open the tank valve slowly, then ignite per the manual with the flame control at its lowest setting. Lighting at full blast is how you get a flare.
Step five: Run it at the setting you actually want. A low flame lasts all evening and looks better than a roaring one.
Step six: Shut it off at the tank. Not just the burner knob. Close the tank valve, let the unit cool completely, then move it.
Smoke management, which is the whole game
If a fire is smoking you out, the cause is almost always one of four things.
Wet or green wood is the first. Seasoned, split firewood burns hot and clean. Unseasoned wood spends its energy boiling off moisture, and that steam carries smoke sideways into your face.
A fire that is too big is the second. Smothering a huge pile starves it of oxygen and it smolders. Two or three split logs arranged loosely with air between them beats a full box every time.
Poor airflow is the third. Keep logs off the bottom grate so air can move under them, and keep the fuel below the rim so air can move over them.
Your own body is the fourth. A person sitting between the fire and the wind breaks the draft and sends smoke around their chair. Sit upwind. If you want to stop chasing the smoke entirely, look at a double-wall pit that burns its own smoke, because secondary burn is the real version of the "smokeless" claim. Everything else is marketing.
Safety rules that are not optional
Keep a bucket of water, a garden hose, or a fire extinguisher within reach every single time. Never use gasoline, and never squirt lighter fluid onto a fire that is already burning. Keep children and pets a clear body length back, and teach kids the "stop, drop, and roll" line before the first fire, not after. Obey burn bans and local ordinances, which can change week to week in a dry fall. Dispose of ash in a metal container with a lid, and let it sit for a couple of days before it goes anywhere near a trash bin. And never, ever run a propane unit indoors or in an enclosed space, because carbon monoxide is invisible and it does not smell like anything.
What this all costs
Costs split into three tiers. Budget wood pits are the cheapest way into a real fire, but they are usually the thinnest steel, so a cover and a screen are part of the price whether or not they are in the box. Mid-range propane portables cost more up front and less per evening, because a refillable tank is cheaper than disposable canisters and you are not buying firewood. Premium smokeless pits sit at the top, and they earn it if you use the pit weekly, because the smoke-free experience is the feature you are paying for.
For the two picks above, check current Amazon price on each listing, then add the accessories that make them last: a spark screen, a fitted cover, and a metal ash can. Those three items cost less than a single replacement pit.
The mistakes I see most
Buying the pit before deciding wood or propane. Choosing thin steel because it looked fine on a screen. Skipping the spark screen. Setting the pit on a wood deck or under an overhang. Buying a "fire pit" that is really a planter with a bowl on top. Forgetting the cover, which is the cheapest longevity upgrade there is. And buying a pit that is too big for the space, which is how a relaxing fire becomes a job you have to manage from a folding chair.
The bottom line
Pick the fuel first, because everything downstream depends on it. Pick a pit with real steel in it, a real spark screen, and airflow you can see. Put it on a surface that cannot burn, ten feet from anything that can. Then build small, hot fires and sit upwind.
That is the whole method. Fire is simple. Steel and airflow are the only parts that are hard, and now you know which questions to ask before you spend anything.