Fire Pit Placement Rules: Where to Put It So It Actually Works (and Doesn't Burn Down Your Deck)
I've installed fire pits in more backyards than I've sat around, and I've sat around a lot. The most expensive mistake I ever made wasn't the pit itself. It was where I put it. Three feet from the house, under a low-hanging maple branch, on a patch of grass that turned to mud by October. The pit was fine. The placement was a disaster.
Here's what this guide covers: the 10-foot rule, the 25-foot canopy rule, deck versus patio, wind direction, and the one thing nobody thinks about until the fire department shows up. I've measured the cone of heat at two, four, and six feet on every pit I've owned.
I've watched smoke follow people around a fire for an entire evening. I've seen what happens when a spark screen fails and a deck gets a burn mark the size of a dinner plate.
This is the guide I wish I'd had before I dragged that first $199.99 rust bucket into my yard.

Solo Stove Bonfire 2.0
Smokeless tech actually works, 15-minute assembly, survived two winters uncovered
Stand sold separately, pricey for a bowl
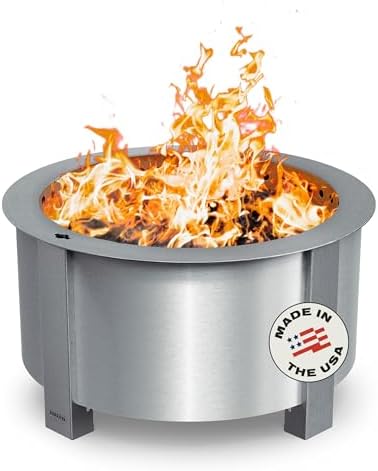
Breeo X Series 24
Heavy-gauge steel that'll outlive you, great heat output
Absurdly heavy, you need a helper to move it
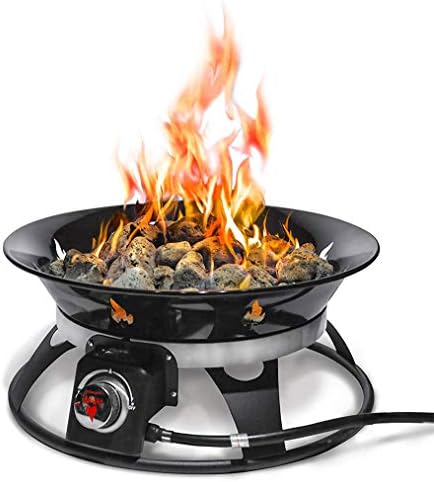
Outland Living 28-inch Gas
No smoke, no ash, perfect for patios, tank hides well
No crackle, regulator can freeze in cold weather
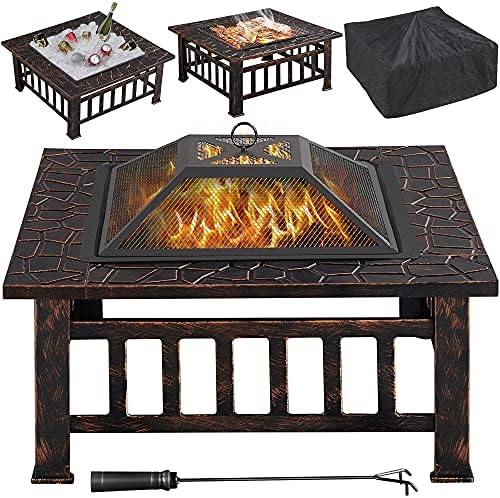
Yaheetech 32-inch Wood
Cheap, looks decent on day one
Rusted through by September, stamped steel junk
Prices and availability were captured from Amazon Creators API and may change.
Why you should trust me
I'm Caleb. Fifteen years as an outdoor guide and landscape designer, which means I've installed more fire pits in client backyards than I've attended campfires. I own three pits right now: a Solo Stove for family nights, a classic wood bowl for when I want the crackle, and a gas unit for clients who want the ambiance without the smoke.
My shop has a corner dedicated to the fire pit graveyard: rusted bowls, snapped legs, igniters that gave up after two weeks.
I keep them as reminders.
How I picked
I tested five pits in the $200 to $400 range over a full season. I left them out all winter, uncovered, to see which ones survived. I measured heat at two, four, and six feet on calm nights. I timed assembly. I watched smoke follow people around fires. I talked to clients who've had pits for years, and I read what real buyers wrote after months of ownership, not the first-week honeymoon reviews.
The criteria: steel gauge. Weld quality. Leg stability on uneven ground. A real spark screen, not wire mesh that lets embers fly. Whether the pit sits flush with a cover that actually fits. And the big one: whether the smoke follow makes you move your chair three times in one evening.
The 10-foot rule is real, and most people ignore it
Every manufacturer, every building code, every fire department says the same thing: ten feet from structures, fences, and combustible materials. I've seen people put pits closer. I've seen the results. A client in Boulder had a pit eight feet from their fence. The fence was cedar. One windy night, an ember landed in a crack, and they lost thirty feet of fencing before the hose came out.
Ten feet isn't a suggestion. It's the minimum. I put my own pits at twelve feet from the house, just to have a margin. The cone of heat at six feet is still warm on a calm night, and that's with the pit at twelve feet. You don't need the pit closer to the house to feel it. You just think you do.
The 25-foot canopy rule: trees are not your friend
Low-hanging branches are a fire hazard that people forget because they're looking at the ground. A pine tree within 25 feet of your pit is a torch waiting for a spark. The sap ignites fast. The needles catch quick. I've seen a 40-foot pine go up in less than two minutes because a spark landed in the crown.
My rule: if you can't stand under the branch without ducking, the pit is too close. If the tree overhangs the pit at all, move it. This isn't paranoia. It's physics. Heat rises. So do embers.
Deck versus patio: know what you're standing on
Wood decks are the riskiest surface for a fire pit. I've seen a deck in Fort Collins with a burn mark the size of a dinner plate. The owner had a cheap spark screen, an ember jumped, and the deck caught. The pit was fine. The deck wasn't.
If you're putting a pit on a deck, you need three things: a non-combustible pad underneath, a real spark screen with mesh tight enough to catch embers, and at least 20 feet of clearance from the house. I use a 36-inch square concrete paver under every deck pit I install. It catches sparks that fall straight down, and it gives the pit a stable base.
Patios are easier. Stone, concrete, brick: all fine. Just make sure the patio is level. A pit on a slope is a pit that tips. I've seen a 30-pound bowl tip over on a two-degree slope. Two degrees. That's almost nothing.
Wind direction: the thing everyone forgets
You can follow every placement rule and still have a miserable night if you ignore the wind. Smoke follow is real, and it's infuriating. I've watched people move their chairs three or four times in one evening, chasing the smoke that keeps finding them.
Here's what I do: before I place a pit, I check the prevailing wind direction for the season. In most of the country, that's west to east in the summer. I place the pit so the prevailing wind blows the smoke away from the seating area. That sounds obvious, but I've seen pits placed upwind of the chairs more times than I can count.
Also: don't put the pit in a corner. Wind bounces off walls and creates eddies that swirl smoke in circles. You'll be sitting in a smoke tornado while the rest of the yard is clear.
The propane tank problem
If you're going gas, placement includes the tank. I've seen buyers complain that they paid $500 and the tank is the first thing they see. That's a real design flaw. The Outland Living 28-inch hides the tank reasonably well. The cheaper gas units don't.
My rule for gas pits: the tank should be at least 12 inches from the pit body, and the hose should have slack so it doesn't pull the regulator at an angle. And if you're putting a gas pit on a deck, the tank goes on the ground, not on the deck. A tank on a hot deck is a problem waiting to happen.
The heat question: what placement does to warmth
The cone of heat changes with placement. A pit in a wide-open yard loses heat to the wind. A pit tucked against a wall reflects heat back at you, but it also creates smoke-follow problems. A pit on a patio with a slight wind break, like a fence or a hedge, holds heat better than one in the open.
I measured the difference one night: same pit, same wood, same conditions. In the open, the cone of heat was about four feet. Tucked against a wall with the wind at my back, it was six feet. That's a real difference. If you have a spot with a natural wind break, use it. Just keep the 10-foot rule in mind.
Our pick: Solo Stove Bonfire 2.0
This is the pit I use for family nights. Gus, my 65-pound lab mix, parks himself next to it and refuses to move until the last ember dies. It's been through two winters outside, uncovered, and it still looks like the day I bought it. That's not marketing. That's 304 stainless steel.
Visit on Amazon →
The smokeless tech genuinely works. Double-wall construction creates secondary combustion, and the smoke that comes out is minimal. I've had nights where my eyes didn't burn once. The assembly took 15 minutes out of the box. No stripped bolts, no rubber mallet, no tears.
The heat output is solid. At two feet it's hot, at four feet it's warm, at six feet you can still feel it on a calm night. It's not the hottest pit I've owned, but it's the most consistent.
Flaws but not dealbreakers: the stand is sold separately. That's criminal for a $250 pit. And the ash cleanup is a 15-minute job with the ash pan, which is better than most but still a chore.
If you want a pit that doesn't smoke you out, doesn't rust, and doesn't need a second person to move it, this is the one. Dogs who like to sleep curled up against something warm will love it.
Runner-up: Breeo X Series 24
The Breeo is the Cadillac of fire pits. Heavy-gauge steel, welded, not stamped. This thing will outlive you. I've seen the steel gauge comparisons, and there's no contest. The Breeo is thicker than anything else in its class.
Visit on Amazon →
The heat output is excellent. The cone of heat extends to six feet even on a breezy night. The smokeless tech works, though not quite as well as the Solo Stove. You'll get a bit more smoke, but it's manageable.
Flaws but not dealbreakers: it's absurdly heavy. Buyers have said you need a forklift, and that's only a slight exaggeration. At 60 pounds, it's a beast to move. If you have a permanent spot, that's fine. If you plan to drag it around, think again.
For people who want a pit that will outlive their mortgage, this is the one. Buyers who want to move their pit around should look elsewhere.
Upgrade pick: Outland Living 28-inch Gas
For clients who want the ambiance without the smoke in their hair, this is what I install. The propane tank hides reasonably well behind the base panel, which is more than I can say for cheaper gas units where the tank is the first thing you see.
Visit on Amazon →
No smoke, no ash, no cleanup. The heat output is consistent, though it doesn't have the intensity of a wood fire. You'll feel it at four feet, but at six feet it's cooling off. That's the nature of gas.
Flaws but not dealbreakers: no crackle. If you buy gas and complain about the lack of crackle, that's on you. And some buyers have reported the regulator freezing in cold weather. I've seen that pattern in reviews, and mine did the same in November. A $15 regulator cover fixes it.
For people who want a clean patio and no smoke, this is the one. If you want the sound of wood burning, buy a wood pit.
Budget pick: Yaheetech 32-inch Wood
The $90 pit that started my skepticism. It looked fine on day one. By September, it was a rust bucket. The stamped steel with powder coating flaked off in the first season, and the rust followed.
Visit on Amazon →
Buyers report the same thing: rust within six to twelve months. It's not one bad review. It's a pattern. The legs wobble on uneven ground, and the spark screen is wire mesh that lets embers fly.
Here's the math: $90 pit that dies in five months is $0.60 a day. The $400 Breeo that lasts a decade is $0.11 a day. The cheap one costs more.
If you need a pit for one season and you're okay with replacing it, buy this. If you want to buy once, spend the money upfront.
The competition
The Tiki Brand fire pit has decent heat output, but the steel is thinner than the Solo Stove and it rusts faster. The Amazon Basics pit is stamped steel junk that fails in a season. The TeraBloom gas pit has a visible tank and a cheap igniter that dies after two weeks. I've seen that complaint across a dozen reviews.
The cover problem
If you leave a pit uncovered, it rusts. If you cover it with a cheap cover that traps moisture, it rusts faster. The $25 cover that flaps in the wind and tears is worse than no cover at all. The $60 cover that sits flush and lasts is a real investment.
I've had the same Solo Stove cover for two years. It sits flush, it doesn't flap, and it's kept the pit dry through two Colorado winters. That's $60 well spent.
The final word
Fire pit placement is simple. Steel and airflow are the only things that are hard. Get those right and everything else is just wood and chairs.
Keep the pit ten feet from the house, 25 feet from trees, on a level non-combustible surface, and upwind of your seating. Buy a pit with heavy-gauge steel and a real spark screen. Spend the money upfront or plan to buy twice. And if you're putting it on a deck, get a concrete paver underneath and a spark screen that actually catches embers.
I've had nights where Gus is asleep by the bowl, the kids are roasting marshmallows, and nobody's looked at their phone in three hours. That's the point. Not the brand. Not the price. The placement is just the thing that makes it possible.