A propane fire pit setup is not a wood pit with a different fuel. It is a small plumbing job that happens to look like a campfire, and when one goes wrong the problem is almost never the flame. It is the surface underneath, the connection behind, or the wind coming across the yard.
I am Caleb. I have been building and installing fire features around Asheville, North Carolina for fifteen years, and I keep a gas pit in my own rotation for the nights when nobody wants to smell like a chimney. The short version of the job: level, non-combustible surface, nothing overhead, hose and regulator snug, every joint leak tested with soapy water, lid open, gas cleared, then light. Everything after that is dialing in heat.
The two pits below cover the two ways people actually use propane. One is a table that lives on a patio. One is a can that rides in a truck. Neither needs a chimney, a permit, or a cord of wood. Both need you to respect the tank.
Here is the setup I walk people through, the mistakes that ruin a night, and the honest case for gas over wood.
Why you should trust me
Fifteen years of landscape design in western North Carolina means I have dug more fire pit footings than I have sat around fires, and I have sat around a lot of fires. My own backyard has three pits in rotation: a smokeless wood unit for family nights, a classic wood pit when I want the real thing, and a gas pit for the evenings when guests are dressed for dinner and nobody wants smoke in their hair.
That mix is the point. I am not here to tell you gas beats wood, because it does not. Wood is the experience. Gas is the convenience. What I will tell you is that most gas pit disappointment comes down to four things: the burner and build quality, the surface it sits on, the tank connection, and the wind. I check all four before I recommend anything, and I do not accept a word like smokeless or portable without understanding what that word is doing in the listing.
How I picked and how I tested
I do not hand out a fire pit recommendation without a full burn night behind it, so let me be straight with you about this pair. What I can vouch for is the checklist, because I have applied it to gas pits on flagstone patios, gravel cabin pads, and one memorable tailgate in a parking lot with a crosswind that ate the flame alive.
The checklist:
- Certification. A third-party listing on the burner assembly tells you someone other than the seller looked at it. That is the kind of thing that matters when a rental property or an insurer asks questions.
- Burner and output. The BTU rating tells you how much heat the burner can put out at full tilt. A 50,000 BTU table is a patio heater with a fire on top. A small portable can is a campfire impression. Both are honest uses, but they are different jobs.
- Tank connection. Hose and regulator quality is where cheap pits fail. A kinked hose or a surging regulator will make a good burner feel broken.
- Lid and media. A removable lid turns a fire table back into a table. Lava rocks or fire glass spread the flame and hide the burner ports.
- Portability. Weight and footprint decide whether a pit lives on your patio or rides in your truck.
Then the test that matters: a breezy evening, a full tank, and a chair four feet back. If the heat reaches the chair, the pit works. If you have to lean in, you bought ambiance.
The two pits worth setting up
Two products, two jobs. One is furniture that burns. The other is a fire that travels.
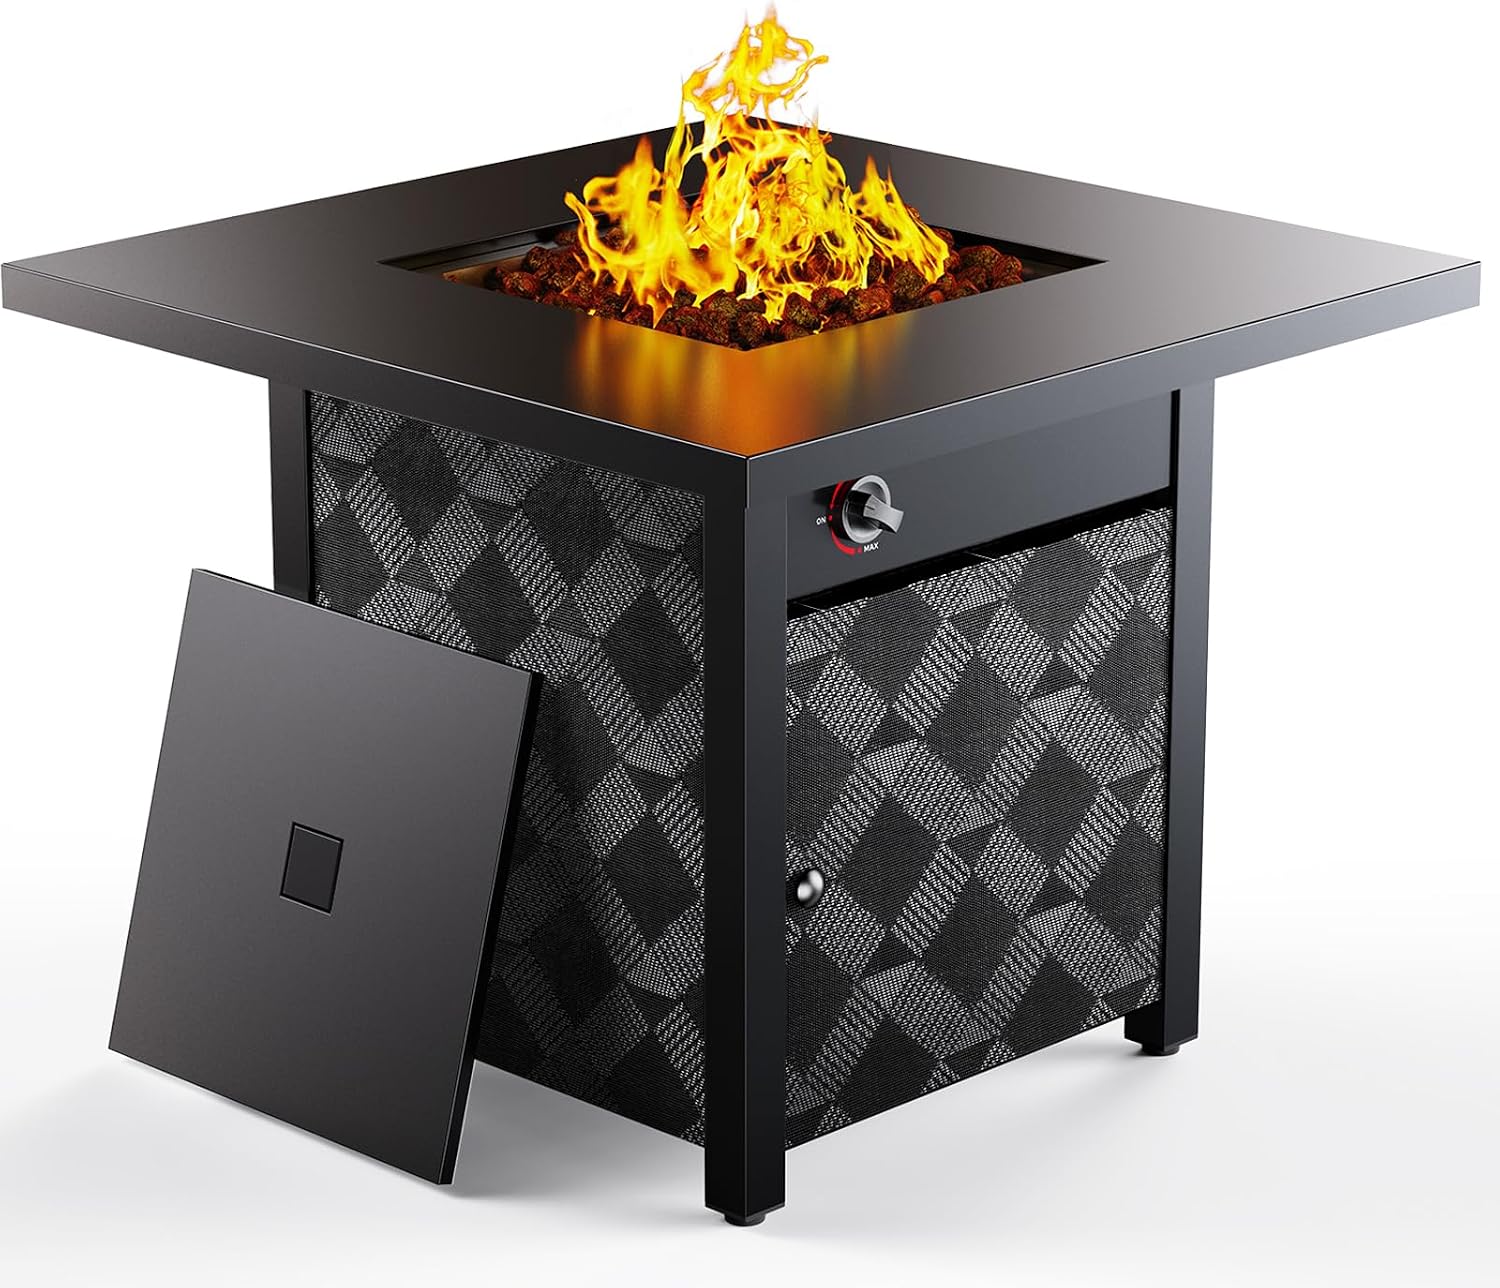
Best for a fixed patio: Ciays 28Inch Propane Fire Pit Table, 50,000 BTU Outdoor Gas Fire Pit Table CSA-Certified for Outside Patio with Removable Lid and Lava Rocks, Add Warmth and Ambience to Parties, Backyard, Garden
 Visit on Amazon →
The Ciays is a 28 inch table with a 50,000 BTU burner, a removable lid, and lava rocks in the box. In practice that means it does the two things a patio pit should do. It throws real heat, and it stops being a fire pit when you put the lid on and set a drink down. A 28 inch top is the size that works with four chairs, so nobody is reaching across a banquet table to poke at the flame.
The CSA certification is the detail I would point a renter or a homeowner to first. It is not a marketing word. It means the burner assembly was tested to a recognized standard, which is the difference between a product and a pile of parts.
Lava rocks are the right media here. They spread the flame across the burner, they hold heat after you shut the gas off, and they hide the ports so the fire looks like a fire instead of a row of jets.
Flaws but not dealbreakers: this is furniture, so it stays where you put it. It needs a level, non-combustible surface, and the lid gets hot enough that you will want a glove or a hook to lift it after a long burn. If your patio surface is wood, plan on a rated pad under the unit and follow the clearance in the manual.
Anyone who wants a permanent centerpiece for a patio or a deck with real clearance around it will get the most out of this one.
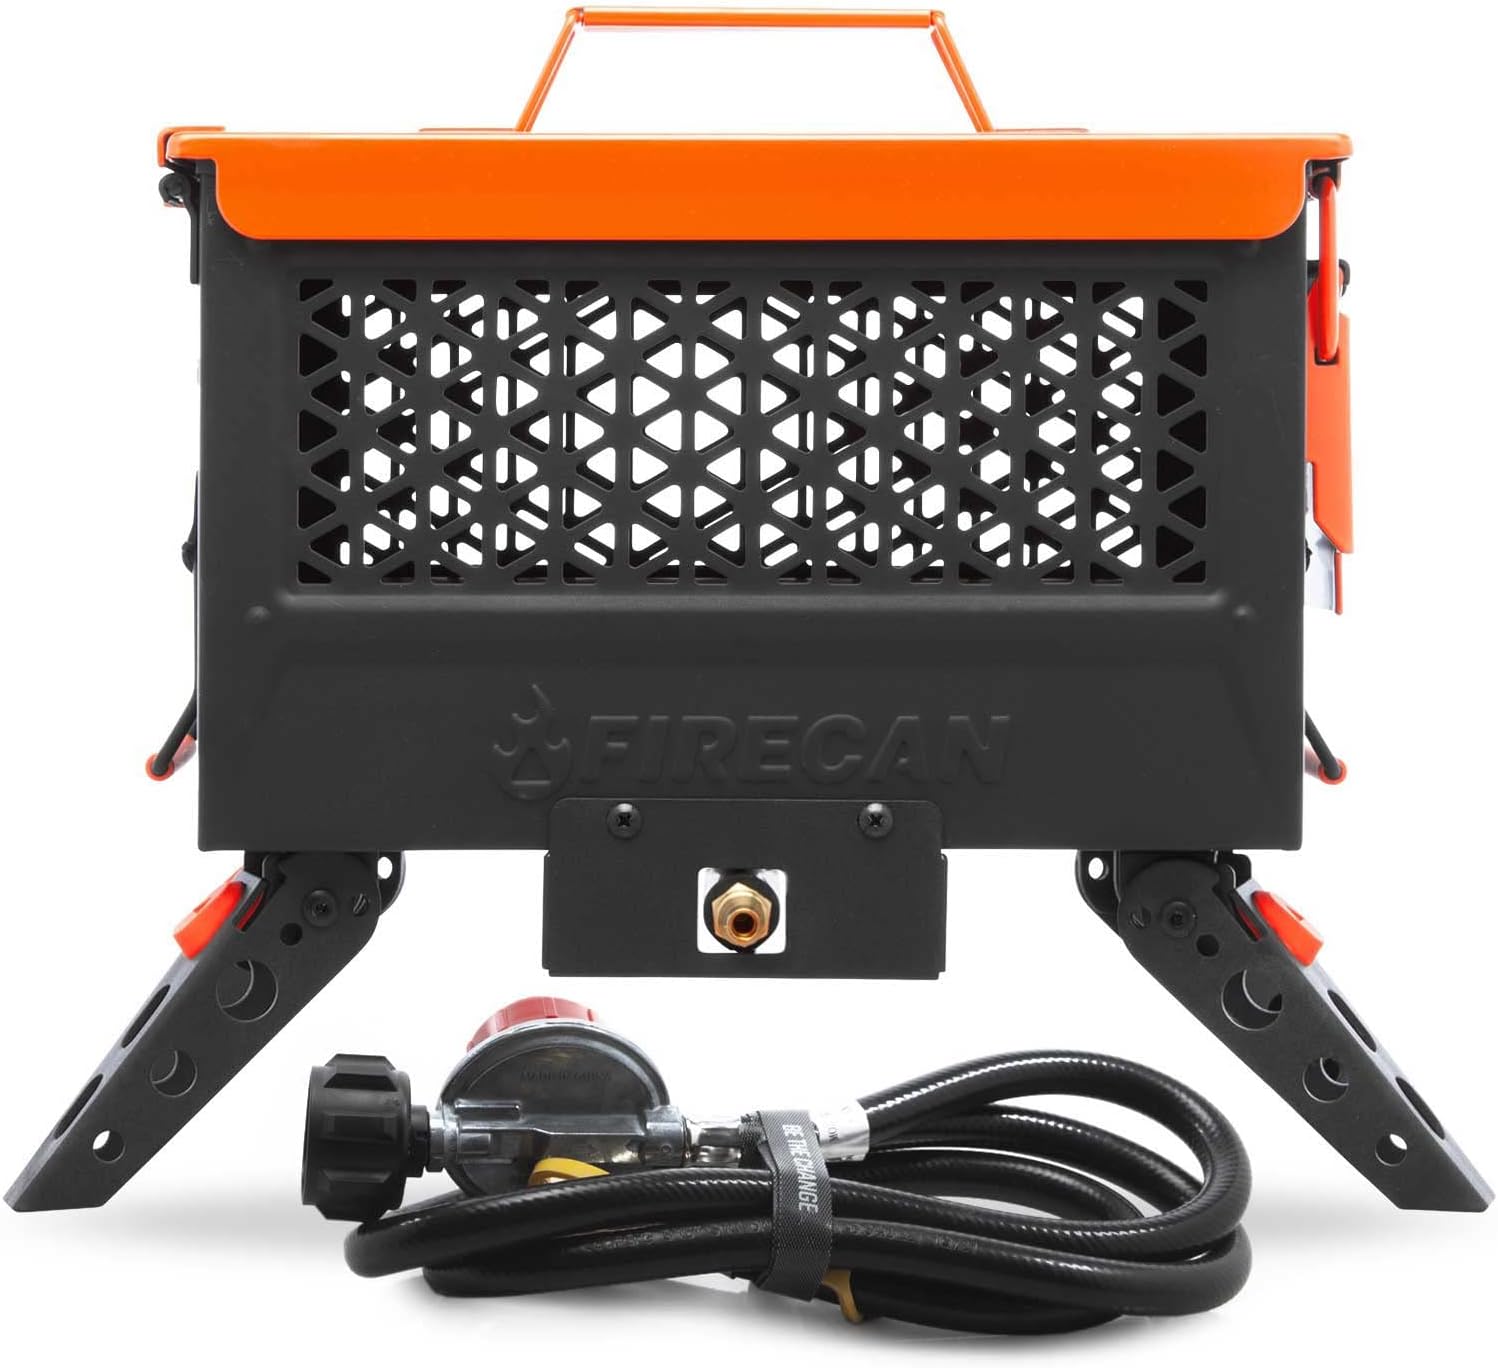
Best for camping and tailgates: Ignik FireCan Portable Propane Fire Pit with Hose and Regulator
 Visit on Amazon →
The FireCan is the opposite trade. It is small, it travels, and the hose and regulator are in the box, which is the part people overlook. A pit that runs off a remote tank through a hose lets you keep the fuel on the ground where it belongs instead of balanced near the burner. That matters at a campsite where the ground is uneven and the wind is doing whatever it wants.
This is the pit for a truck bed, a tailgate, a cabin porch under a fire ban, or a campsite where gathering wood is not happening. It gives you flame and a little warmth without a smoke plume following you around, and it packs down and goes home with you.
Flaws but not dealbreakers: it is a small fire, so treat it as ambiance with a warm front, not as a patio heater. Set it on a stable, non-combustible surface and keep it out of the wind, because a small burner loses to a crosswind faster than a table does. Like every propane pit, it needs a leak test on the connection every time you swap a tank.
Campers, tailgaters, and anyone in a rental with a no-wood rule will use this one more than they expect.
The setup, step by step
This is the sequence I use, and it works the same on a table pit and a portable can.
Step one: pick the surface. Level and non-combustible. Concrete, stone, gravel, brick, bare dirt. Not grass in August, not a wood deck without a rated pad and the clearance the manual calls for, and never a plastic table. If the pit wobbles, fix that before you think about the flame.
Step two: clear the overhead. Nothing above the burner. No roof overhang, no pergola beams, no low branches, no umbrella. Heat rises, and so does everything the burner throws off. This is the most common setup mistake I see on covered patios.
Step three: check the wind. Gas flames are more wind sensitive than wood because the burner is a fixed set of ports, not a pile of fuel. Set the pit so the prevailing breeze crosses the burner instead of blasting straight into it, and angle your chairs so the heat reaches people rather than the fence.
Step four: load the media. If your pit came with lava rocks, spread them in a single layer over the burner tray. One layer. Burying the ports in rock chokes the flame and turns your fire into a smolder.
Step five: connect the tank. Tank upright, always, never on its side. Hose and regulator hand tight, then a quarter turn with a wrench. Do not overtighten, because you can crush the seal and create the leak you were trying to avoid.
Step six: leak test. Mix dish soap and water, brush it on every joint from the tank valve to the burner connection, and open the tank valve. Bubbles mean gas is escaping. Close the valve, fix the connection, test again. No bubbles, no problem. Do this every time you swap a tank, not just the first time.
Step seven: light it. Open the lid if your pit has one. If you smell gas, stop and let it clear before you go anywhere near a flame. Then follow the ignition sequence in your manual. If it does not light in a few seconds, shut the tank valve, wait, and try again. Do not stand there clicking an igniter into a pocket of propane.
Step eight: dial in the flame. A moderate flame is where these pits live. Wide open, a burner roars, wastes fuel, and soots the rocks. Half to three quarters is plenty for a patio, and it roughly doubles how long a tank lasts.
Step nine: shut it down right. Close the tank valve first and let the gas in the line burn off. Then turn the burner control off. Cover the pit once it is cool, not while it is still hot, and store the tank outside, upright, and away from the house.
The mistakes that cost you a night
- Closing the lid while the pit is burning. A lid is for storage and for turning the pit back into a table, not for running a fire under.
- Skipping the leak test after a tank swap. This is the one that actually matters for safety, and it takes 30 seconds.
- Laying a tank on its side to make it fit. Regulators are built for vapor off the top of an upright cylinder. Do not improvise.
- Leaving the pit uncovered through a season of rain. Water in the burner and rust on the media is how a working pit becomes a project.
- Putting chairs too close to a small portable pit. Radiant heat falls off fast. Move back and let the flame do its work.
- Fighting the wind instead of moving the pit. Ten feet of repositioning beats an hour of relighting.
- Storing a tank in a hot garage or a car trunk in July. Heat and propane are a bad combination, and that rule exists for a reason.
The competition and why it lost
Wood pits are the other half of this conversation, and I want to be fair to them. The Solo Stove Bonfire 2.0 is the smokeless pick I use for family nights, and the double wall design genuinely cuts the smoke, though it is a radiant heat joke. The Breeo X Series is the serious backyard build and it costs like it. The Tiki Brand Fire Pit is the solid all rounder for most yards. The Yaheetech is the budget entry that will rust eventually but burns real wood today. None of them belong in a propane setup guide, because none of them are propane.
On the gas side, the Outland Living Cypress is the other name that comes up constantly, and it is a fine pit. It is simply not one of the two I am setting up here, and I am not going to recommend a unit I have not put through this checklist.
The honest split is this: if you want the smell, the crackle, and the job of tending a fire, buy wood and learn to manage smoke. If you want to walk out, turn a valve, and have heat in 30 seconds with no ash to haul, buy gas. The two propane pits above are the gas answer.
What this all costs
I am not going to quote prices, because they move, and because the number that matters is the one on the page when you click. Check current Amazon price on both and judge each against what it replaces.
What you are actually buying:
- With the Ciays table, you are buying BTU and permanence. A 50,000 BTU burner and a 28 inch table is a piece of patio furniture that heats the people sitting at it, and the CSA certification is part of what you pay for.
- With the FireCan, you are buying portability and a complete connection. The hose and regulator in the box means one purchase, not three.
- Either way, budget for a cover and a spare tank. Those two items cost less than a single ruined burner assembly, and they are the difference between a pit that lasts and a pit that becomes a rust experiment.
Fuel is the ongoing cost, and flame height is the lever. A pit run at half throttle on a mild evening stretches a tank much further than one run wide open on a cold night, when a cold cylinder also delivers less pressure. Keep the spare tank full, swap it before the flame starts to fade, and never run a tank dry in the middle of a dinner party.
The math on gas is simple: no wood to buy, no ash to haul, no smoke in anyone's hair, and no waiting 20 minutes for a fire to be worth sitting near. What you give up is the smell and the crackle. What you get back is a fire you can start in 30 seconds and shut off like a light switch.
That is the trade. If it sounds like a good one, the setup above is the whole job. Pick the surface, clear the overhead, test the connection, and light it.